THE LYRIC THEATRE: PRESERVING HISTORY
CLIENT WORK IMAGE360 2023
LAYOUT DESIGN | PRODUCTION | ENVIRONMENTAL DESIGN | INSTALLATION
BRAINSTORMING & DESIGN
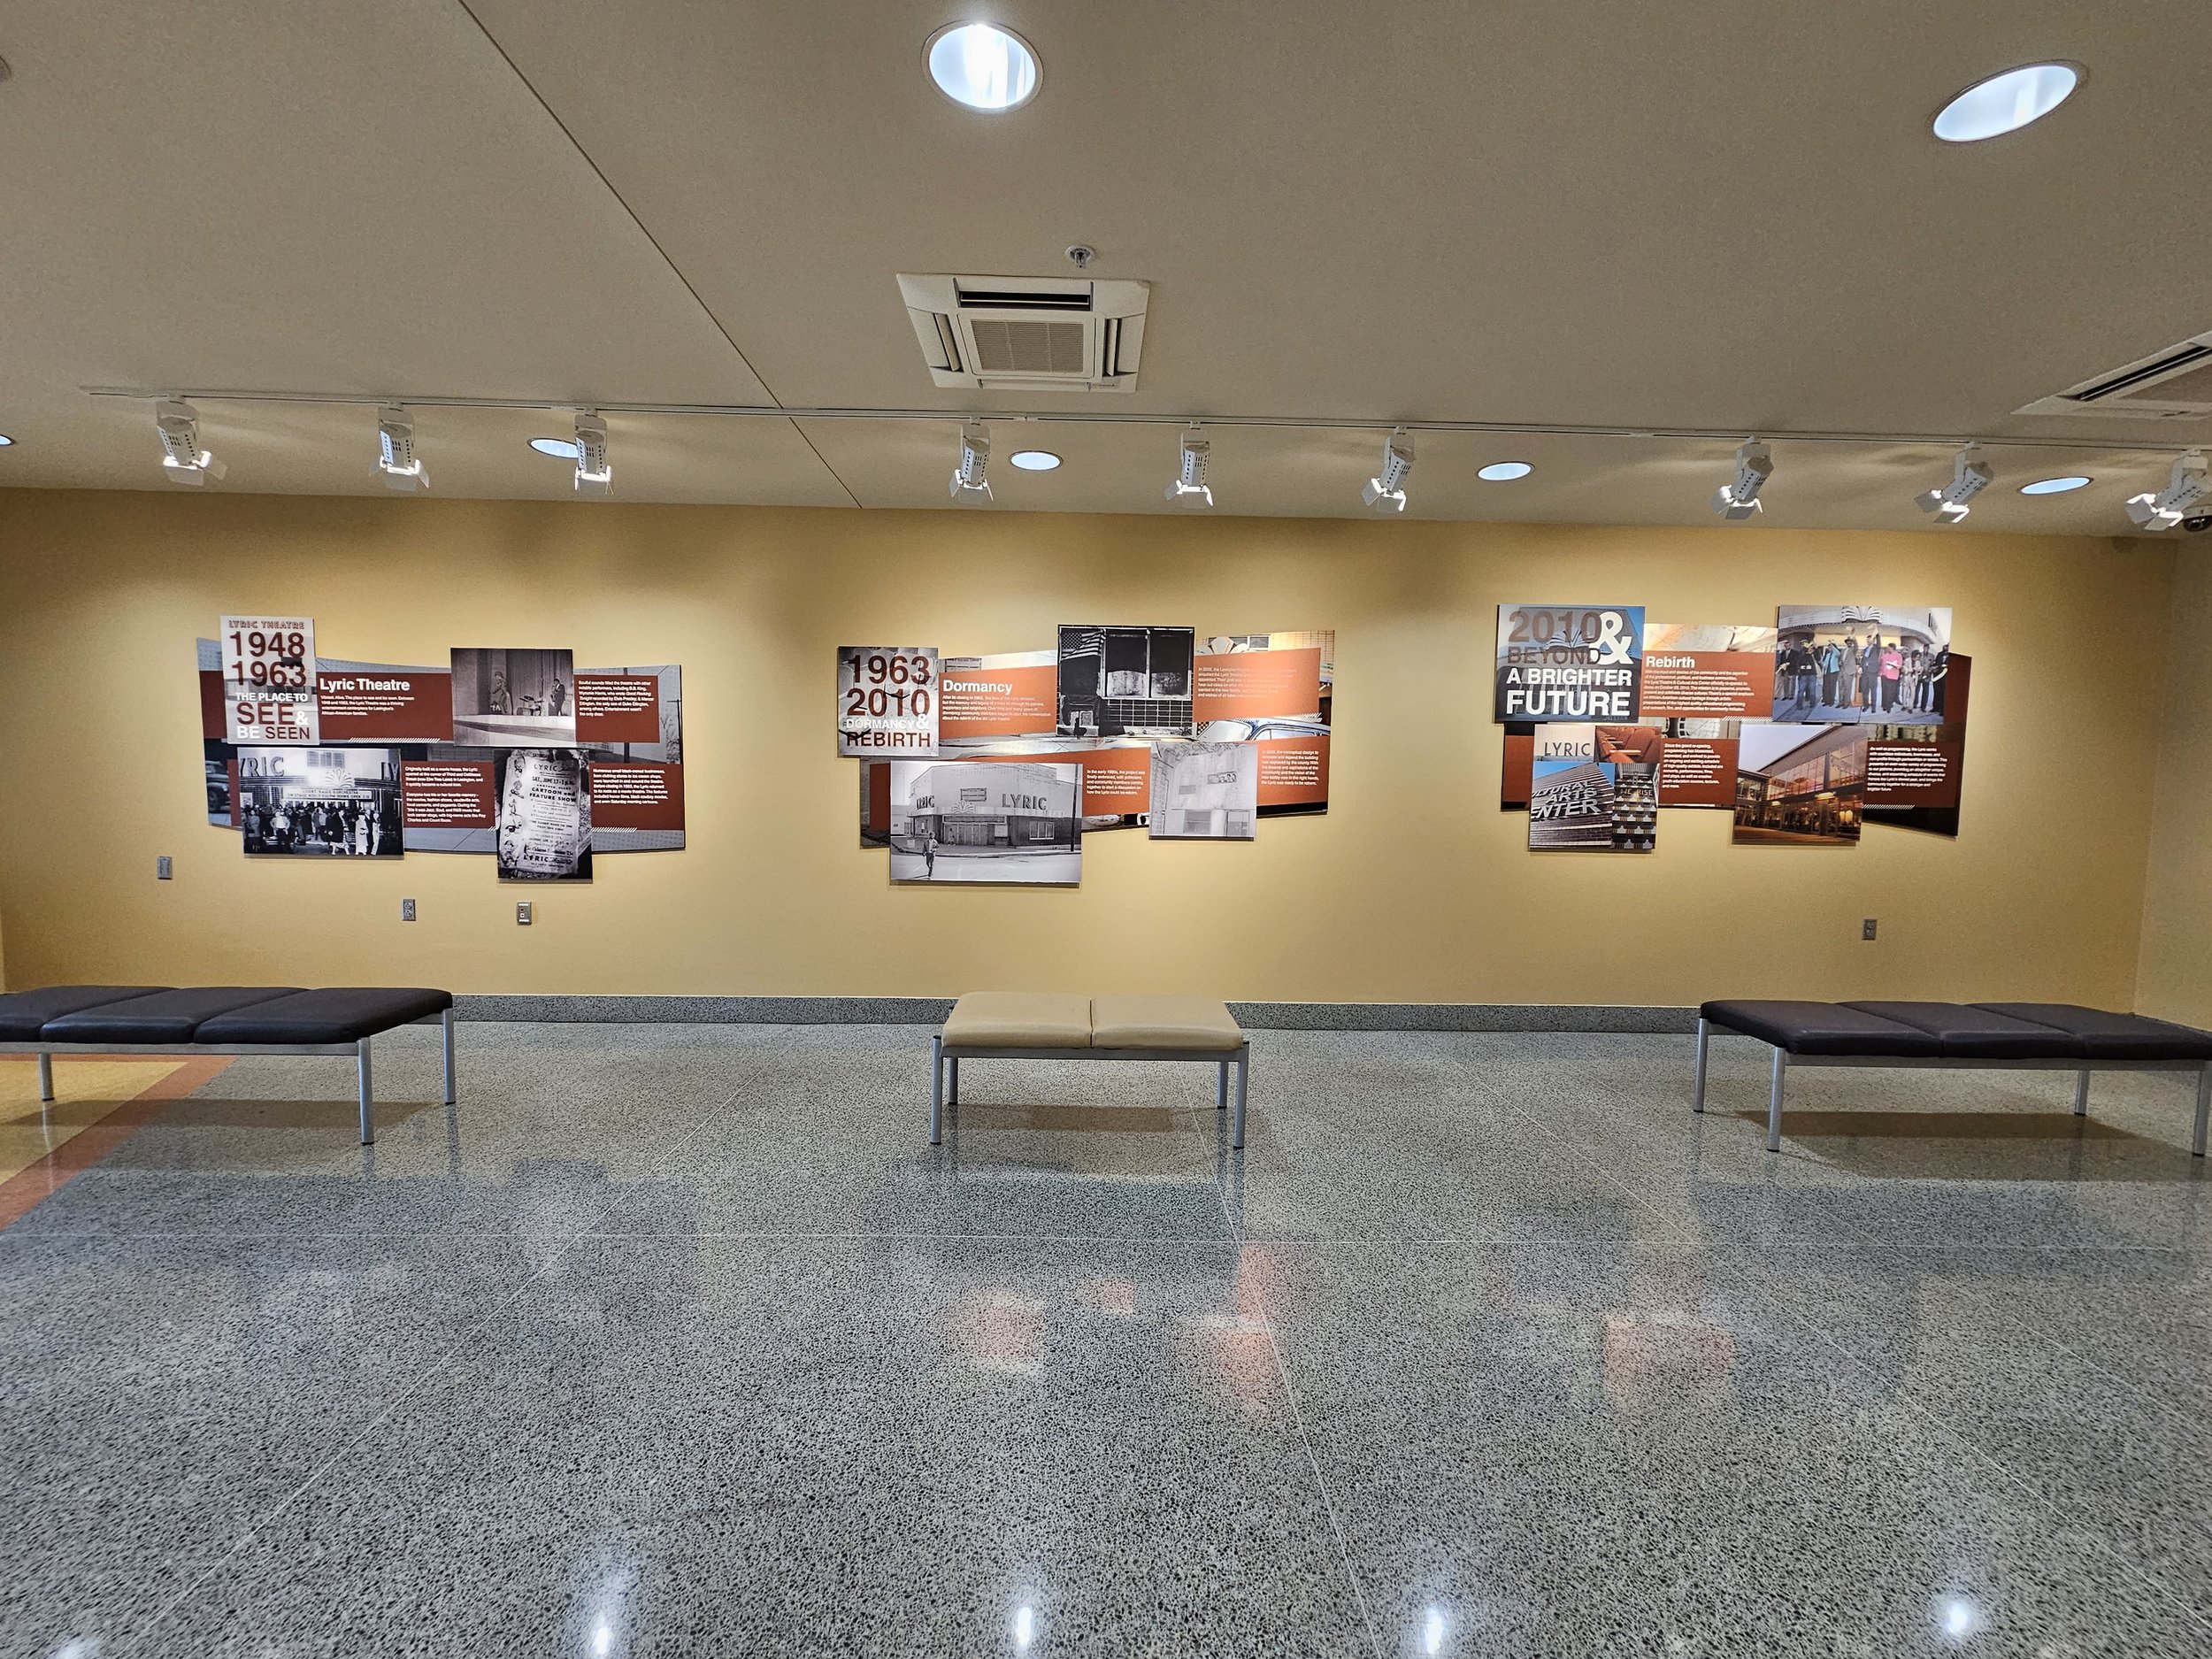
This project was made for The Lyric Theatre and revealed at their 2023 Juneteenth event. It was a great opportunity to be able to work on an important historical landmark in the Lexington community, and to be able to create a timeline of the history for the building itself, and a Step & Repeat banner for the event.
For the task of designing the timeline, I was given a series of pictures with text captions to put into sequential order. Each picture folder given to me was from different eras throughout the history of the Lyric Theatre. I began with 3 separate panel shapes in order to fit everything on, using the wall measurements given to me. In the end I created some shapes with possible picture placements, making a visual movement from left to right.
After the primary panel shapes were created I used the given images to create some starting secondary panels to place on top. I then laid out typography on top to make an eye catching starting point, with each starting secondary panel being placed on the left of each primary panel.
With the images, I really wanted to capture the history that The Lyric has been through. The Lyric created a vibrant, and rich culture upon opening, followed by an almost 50 year vacancy. An idea followed, making the panels start black and white on the timeline, with the panels and ending in full color, merging somewhere between to bring in the point that the The Lyric is back in action.
The final designs were inspired by a simple, sleek layout that was both easy to follow and read. The captions and pictures on each panel create a visual movement that keeps the eyes going from left to right. The background on the larger panels go from black and white, to full color, featured with halftone texture that is similar to a newspaper. Helvetica became the font choice, as a timeless font that matches the simplicity, and had easy readability for signage.
INSTALLATION & PLANNING
Before installing, the team discussed preparation plans for the installation. In order to get the signs hanging evenly, I created a layout of the wall and how each panel would be laid out. The leveling was achieved through creating cardboard patterns labeled 1, 2 and 3, of each sign in order to drill holes into the wall for the pre-drilled sign.
The A, B, and C cardboard patterns were made for the spacing of each panel and would fit into the corners. After the holes were drilled, the brushed aluminum panel was installed, followed by the acrylic panels on top. The acrylic panels were placed accordingly by using a blank space on the design to fit each panel.


